गाजर का हलवा (Gajar Ka Halwa): बिना घी और मावा वाला असली देसी स्वाद
बिना घी और मावा का गाजर का हलवा (Gajar Ka Halwa) सुनते ही बहुत लोग यह मान लेते हैं कि इसका स्वाद और टेक्सचर वैसा नहीं आएगा जैसा मार्केट या घर का पारंपरिक हलवा होता है। लेकिन ऐसा नहीं है। सही तकनीक के साथ, गाजर और दूध का कॉम्बिनेशन से इतना अच्छा फ्लेवर बनाता है कि अलग से मावा या घी डालने की जरूरत नहीं पड़ती।
इस गाजर का हलवा (Gajar Ka Halwa) की खास बात यह है कि यह कम सामग्री, बिना अतिरिक्त फैट और बिना किसी मेहंगे इंग्रीडिएंट के तैयार हो जाता है, लेकिन स्वाद ऐसा देता है कि आप खुद मानेंगे कि यह रेसिपी पहले क्यों नहीं बनाई। लंबे समय तक दूध पकने की वजह से इसमें गजब का कैरामेलाइज़्ड फ्लेवर आता है और गाजर का असली रंग-स्वाद दोनों उभर कर आते हैं।
यह रेसिपी उन लोगों के लिए भी परफेक्ट है जो हेल्दी ऑप्शन चाहते हैं। अगर आप सच में चाहते हैं कि आपका गाजर का हलवा (Gajar Ka Halwa) हर बार परफेक्ट बने, तो यह डिटेल्ड स्टेप-बाय-स्टेप रेसिपी आपको वही रिज़ल्ट देगी।
गाजर का हलवा (Gajar Ka Halwa) के लिए सामग्री
- आधा किलो लाल गाजर (धोकर, छीलकर, मोटे छेद वाले ग्रेटर से कद्दूकस की हुई)
- 1.5 लीटर फुल-फैट दूध
- 150 ग्राम चीनी
- ¼ टीस्पून इलायची पाउडर
- 1 टेबलस्पून घी (सिर्फ मेवे भूनने के लिए, हलवे में नहीं)
- 10–12 बादाम (कटे हुए)
- 10–12 काजू (कटे हुए)
- 1 मुट्ठी किशमिश
गाजर का हलवा (Gajar Ka Halwa) बनाने की विधि
सबसे पहले गाजर को अच्छी तरह धोकर, सिरों को काटकर छील लें। गाजर को कद्दूकस करते समय मोटे छेद का इस्तेमाल करें ताकि हलवे का टेक्सचर दानेदार और रिच आए। एक भारी तली की कड़ाही या पैन लें, उसमें फुल-फैट दूध डालकर मध्यम आंच पर अच्छी तरह उबालें। दूध उबलते समय बीच-बीच में चलाते रहें ताकि नीचे चिपके नहीं।
दूध उबल जाए तो कद्दूकस की हुई गाजर को मिलाएँ। अब इसे लगातार चलाते हुए पकाएँ ताकि गाजर दूध में अच्छे से घुलती जाए। धीरे-धीरे दूध कम होने लगेगा, और इसी चरण में यह गाढ़ा होकर मावा जैसा टेक्सचर बनाता है। यही तारीका है जिससे यह गाजर का हलवा (Gajar Ka Halwa) बिना मावा और बिना घी के भी रिच बनाता है, क्योंकि दूध का फैट अलग होकर नैचुरल घी जैसा असर देने लगता है।
जब दूध लगभग 70–80% तक कम हो जाए, तब इसमें चीनी और इलायची पाउडर डालकर अच्छे से मिलाएँ। चीनी डालने के बाद मिश्रण थोड़ा पतला होगा, लेकिन घबराएँ नहीं, अब इसे मध्यम-धीमी आंच पर पकने दें। 15–20 मिनट में हलवा गाढ़ा होते-होते चमकदार दिखने लगेगा, जिसका मतलब है कि प्राकृतिक घी भी निकल आया है। गैस बंद करने के बाद एक पैन में थोड़ा सा घी गर्म करें, उसमें बादाम-काजू हल्का रोस्ट करें और किशमिश डालें। इन मेवों को हलवे में मिलाएँ और अच्छे से मिक्स करें।
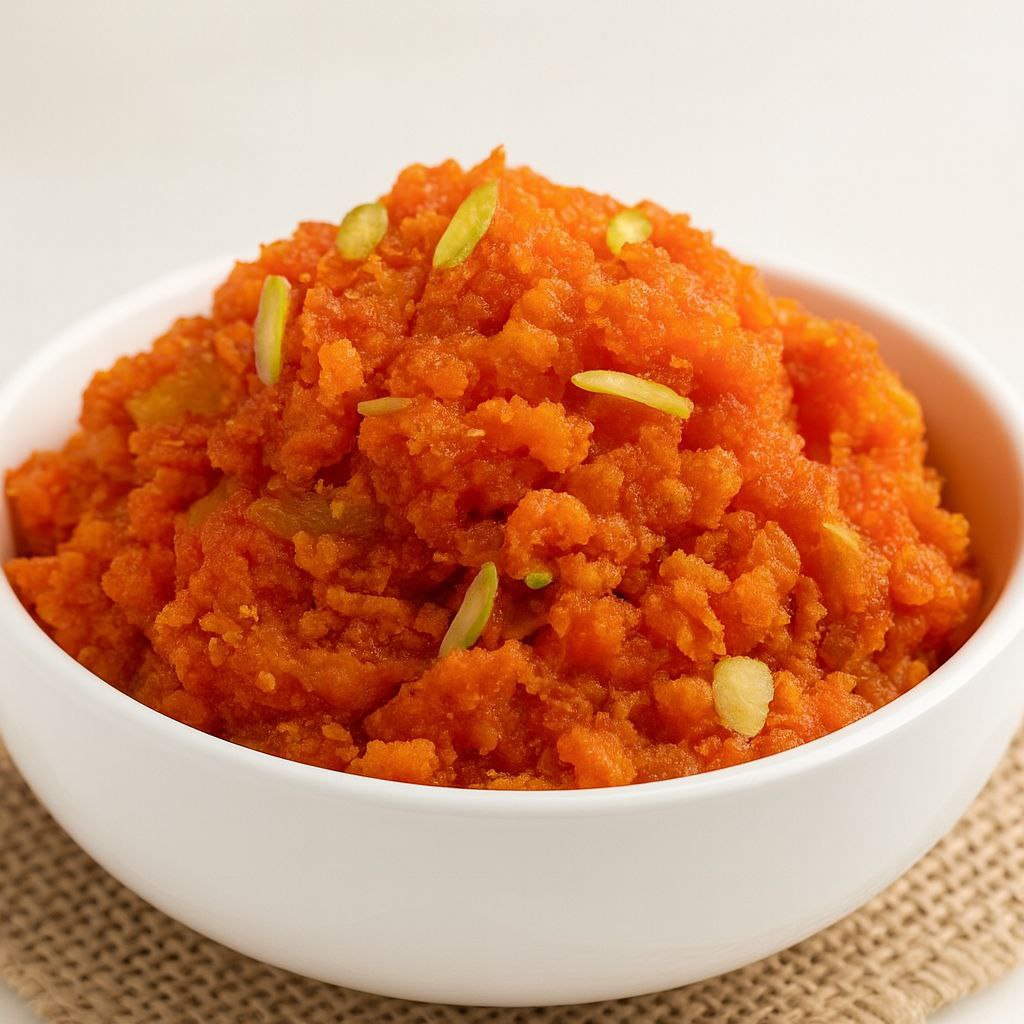
गरमागरम सर्व करें, चाहे तो ठंडी वनीला आइसक्रीम के साथ कॉम्बो बनाएं, स्वाद वाकई गज़ब आएगा।
गाजर का हलवा (Gajar Ka Halwa) के लिए टिप्स
- गाजर हमेशा लाल वाली, सर्दियों वाली चुनें, इनमें मिठास और रंग दोनों बेहतर रहते हैं।
- दूध जितना गाढ़ा होगा, हलवा उतना रिच और मावा जैसा बनेगा।
- हलवे को बीच-बीच में रोककर न पकाएँ, लगातार पकाएँ, यहीं से फ्लेवर डेवलप होता है।
- चीनी डालने के बाद हलवा अचानक पतला हो जाता है, यह नॉर्मल है, थोड़ा और पकाने से सेट हो जाएगा।
- मेवे हलवे में सीधे डालने के बजाय घी में भूनकर डालें तो स्वाद और सुगंध दोनों बढ़ती है।
- अगर आप और रिच टेक्सचर चाहते हैं तो 1–2 टीस्पून दूध का पाउडर मिलाकर भी पका सकते हैं।
- हलवा स्टोर करते समय एअरटाइट डब्बे में रखें, फ्रिज में 4–5 दिन आराम से चलता है।
निष्कर्ष
बिना घी और मावा वाले इस गाजर का हलवा (Gajar Ka Halwa) का असली राज है, दूध को सही तरीके से कम करना और गाजर को धीमी आंच पर पकाना। इस तरीके से बना हलवा हल्का भी होता है, और स्वाद में उतना ही रिच जितना ट्रेडिशनल हलवा। यह रेसिपी आसान भी है और रिज़ल्ट लगातार अच्छे देती है, बस धैर्य रखें और स्टेप्स सही फॉलो करें।
Gajar Ka Halwa Recipe in English
When people hear about Gajar Ka Halwa made without ghee and mawa, many assume that its taste and texture won’t match the traditional halwa made at home or bought from the market. But that’s not true. With the right technique, the combination of carrots and milk creates such a great flavor that you don’t need to add extra mawa or ghee. The special thing about this Gajar Ka Halwa is that it gets ready with fewer ingredients, without extra fat and without any expensive items, yet the taste is so good that you’ll wonder why you didn’t try this version earlier.
Because the milk cooks for a long time, it develops an amazing caramelized flavor, and the natural color and taste of the carrots come out beautifully. This recipe is also perfect for those who want a healthier option. If you truly want your Gajar Ka Halwa to turn out perfect every time, this detailed step-by-step method will give you the exact result.
Ingredients for Gajar Ka Halwa
- Half kilo red carrots (washed, peeled, grated using a coarse grater)
- 1.5 liters full-fat milk
- 150 grams sugar
- ¼ teaspoon cardamom powder
- 1 tablespoon ghee (only for roasting nuts, not for the halwa)
- 10–12 almonds (chopped)
- 10–12 cashews (chopped)
- 1 handful raisins
How to Make Gajar Ka Halwa
First wash the carrots, trim the ends, and peel them. While grating the carrots, use the coarse side so that the halwa gets a grainy and rich texture. Take a heavy-bottomed kadhai or pan, add full-fat milk, and bring it to a good boil on medium heat. Keep stirring in between so it doesn’t stick at the bottom.
Once the milk boils, add the grated carrots. Cook it while stirring continuously so the carrots blend well with the milk. Gradually the milk will start reducing, and at this stage it thickens and forms a mawa-like texture. This is exactly how this Gajar Ka Halwa becomes rich even without mawa and ghee, because the fat from the milk separates and acts like natural ghee.
When the milk reduces by about 70–80%, add sugar and cardamom powder and mix well. After adding sugar, the mixture will loosen a bit, don’t worry. Now cook it on medium-low heat. In 15–20 minutes, the halwa will thicken and start looking glossy, which means the natural ghee has been released. Turn off the heat, warm a little ghee in a pan, lightly roast the almonds and cashews, add raisins, and mix these nuts into the Gajar Ka Halwa.
Serve hot, or pair it with cold vanilla ice cream, the taste will be fantastic.
Tips for Gajar Ka Halwa
- Always choose red winter carrots; they have better sweetness and color.
- The thicker the milk, the richer and more mawa-like the halwa becomes.
- Don’t cook the halwa with long breaks, continuous cooking develops the flavor.
- After adding sugar, the halwa becomes watery; this is normal, it sets again after cooking.
- Instead of adding nuts directly, roast them in ghee; it enhances both taste and aroma.
- For a richer texture, you can add 1–2 teaspoons of milk powder while cooking.
- Store the halwa in an airtight container; it stays good in the fridge for 4–5 days.
Conclusion
The real secret of this Gajar Ka Halwa without ghee and mawa is reducing the milk correctly and cooking the carrots on low heat. This method makes the halwa light yet just as rich in flavor as the traditional version. The recipe is simple and consistently gives great results, just have patience and follow the steps properly.
यह भी पढ़ें: हरी मिर्च का हलवा (Hari Mirch Ka Halwa)
यह भी पढ़ें: ठेकुआ (Thekua): छठ पूजा के लिए कैसे बनाएं
FAQs – गाजर का हलवा (Gajar Ka Halwa) से जुड़े सवाल
Q1. बिना घी और मावा के गाजर का हलवा (Gajar Ka Halwa) सूखा या फीका तो नहीं बनता?
नहीं। अगर दूध को ठीक से कम किया जाए, तो खुद उसमें से फैट निकलकर घी जैसा असर देता है और हलवा रिच बनता है।
Q2. गाजर कद्दूकस मोटे छेद से ही क्यों करनी चाहिए?
क्योंकि मोटे टेक्सचर से हलवा दानेदार, रिच और मार्केट-स्टाइल बनता है। बारीक छेद हलवे को गीला और मैला बना देता है।
Q3. दूध कम होने में ज्यादा टाइम लग रहा है, क्या आंच तेज कर दूँ?
तेज आंच हलवे को कड़ाही में चिपकाती है और जलने का स्वाद आएगा, धीमी या मध्यम आंच ही रखें।
Q4. गाजर का हलवा (Gajar Ka Halwa) में चीनी कब डालनी चाहिए?
दूध लगभग कम हो जाए, तभी चीनी डालें। पहले डालेंगे तो दूध जम सकता है और रंग भी हल्का पड़ जाएगा।
Q5. गाजर का हलवा (Gajar Ka Halwa) पतला रह गया है, कैसे ठीक करें?
बस थोड़ा और पकाएँ। चीनी डालने के बाद हलवा पतला होना सामान्य है, लेकिन पकाने पर सेट हो जाएगा।
Q6. मेवे नहीं हैं, क्या बिना मेवों के भी गाजर का हलवा (Gajar Ka Halwa) बन सकता है?
हाँ, बन सकता है। मेवे सिर्फ स्वाद बढ़ाते हैं, अनिवार्य नहीं हैं।
Q7. क्या इस गाजर का हलवा (Gajar Ka Halwa) में गुड़ डाल सकते हैं?
हाँ, पर गुड़ हमेशा गैस बंद करने के बाद डालें, नहीं तो दूध फट सकता है।
Q8. गाजर का हलवा (Gajar Ka Halwa) जल्दी कैसे तैयार किया जा सकता है?
दूध की जगह दूध और थोड़ा खोया का मिश्रण इस्तेमाल करें, लेकिन तब यह “बिना मावा” रेसिपी नहीं रहेगी।