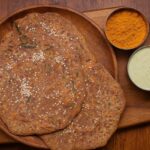
पनीर पराठा (Paneer Paratha): मसालेदार पराठे की लाजवाब रेसिपी
अगर आप रोज़-रोज़ वही पुराने पराठे खाकर बोर हो चुके हैं और कुछ नया ट्राई करना चाहते हैं, तो पनीर पराठा (Paneer Paratha) का यह Green Garlic Special वर्ज़न आपके लिए परफेक्ट है! यह रेसिपी पारंपरिक पनीर पराठे में एक ट्विस्ट लाती है, जिसमें हरे लहसुन (Green Garlic) का झटपट बनाया गया खास हरा मसाला इतना सुगंधित और फ्लेवरफुल होता है कि हर बाइट मुंह में स्वाद का धमाका करती है।
पनीर पराठा (Paneer Paratha) नाश्ते, लंच या डिनर, किसी भी टाइम खाया जा सकता है। यह बच्चों से लेकर बड़ों तक सबको पसंद आता है, क्योंकि इसमें हेल्दी प्रोटीन से भरपूर पनीर और फ्रेश हर्ब्स का कमाल है। इस रेसिपी में आप जानेंगे पनीर पराठा (Paneer Paratha) बनाने के दो आसान तरीके, Stuffed Ball Method और Sandwich Method। दोनों में ही कुरकुरापन और अंदर तक फ्लेवर का परफेक्ट बैलेंस मिलेगा। तो चलिए शुरू करते हैं यह झटपट और स्वादिष्ट रेसिपी।
पनीर पराठा (Paneer Paratha) के लिए सामग्री
आटे के लिए:
- गेहूं का आटा – 3 कप
- नमक – चुटकीभर
- तेल – 1 टीस्पून
- पानी – आवश्यकतानुसार
हरे मसाले के लिए:
- हरा लहसुन (Green Garlic) – 15-20 कलियाँ (जड़ों सहित साफ की हुई)
- हरी मिर्च – 3-4
- ताज़ा धनिया – 1 मुट्ठी
- पुदीना पत्ते – थोड़े से
- अदरक – 1 इंच का टुकड़ा
पनीर स्टफिंग के लिए:
- पनीर – 200 ग्राम (बड़े छेद वाले ग्रेटर से ग्रेट किया हुआ)
- तैयार हरा मसाला – ऊपर बताया गया
- नमक – स्वादानुसार
- कुटी काली मिर्च – ½ टीस्पून
- दरदरा कुटा धनिया – 1 टीस्पून
- अनारदाना पाउडर या अमचूर – ½ टीस्पून
- जीरा पाउडर – ½ टीस्पून
- बारीक कटा प्याज़ – 1 (भरने से ठीक पहले डालें)
सेकने के लिए:
- घी या तेल – आवश्यकतानुसार
- सर्व करने के लिए – मक्खन और अचार
पनीर पराठा (Paneer Paratha) बनाने की विधि
एक बड़े बर्तन में 3 कप गेहूं का आटा और एक चुटकी नमक लें। धीरे-धीरे पानी डालते हुए इसे semi-soft dough की तरह गूंध लें, न बहुत टाइट और न बहुत ढीला। अब इसमें 1 टीस्पून तेल डालकर लगभग 4–5 मिनट तक अच्छे से गूंथें ताकि आटा स्मूद और लचीला बने। फिर इसे गीले कपड़े से ढककर आधे घंटे के लिए रख दें ताकि बेलते समय यह फटे नहीं।
चॉपर में हरा लहसुन (Green Garlic), हरी मिर्च, धनिया, पुदीना और अदरक डालकर दरदरा पीस लें।
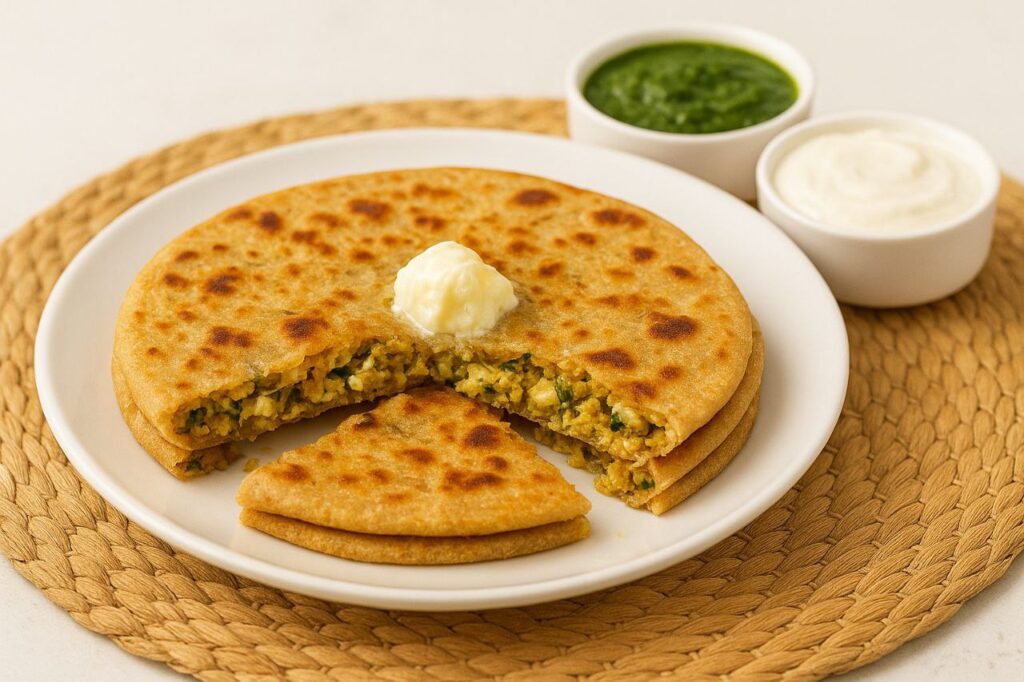
ध्यान रखें – इसे बहुत बारीक पेस्ट ना बनाएं, हल्का दरदरा टेक्सचर रहनी चाहिए। अब एक बाउल में ग्रेट किया हुआ पनीर लें और इसमें तैयार किया गया हरा मसाला, नमक, काली मिर्च, कुटा धनिया, अमचूर और जीरा पाउडर डालकर मिलाएं। भरने से ठीक पहले इसमें बारीक कटा प्याज डालें ताकि स्टफिंग पानी न छोड़े।
इस पराठे को आप दो तरीकों से भर सकते है–
(A) Stuffed Ball Method (पेडा वाला तरीका): आटे का एक बड़ा गोला लें और उसे अंगूठे से दबाकर कटोरी जैसा बनाएं। इसमें तैयार पनीर की स्टफिंग भरें और किनारों को अच्छी तरह बंद करें।
थोड़ा सूखा आटा लगाकर इसे धीरे-धीरे बेलें और मध्यम मोटाई का पराठा तैयार करें।
(B) Sandwich Method (आसान तरीका): दो छोटे गोले लें और दोनों को पतली चपाती की तरह बेलें। पहली चपाती पर स्टफिंग समान रूप से फैलाएं। दूसरी चपाती ऊपर रखकर किनारों को सील करें और सूखा आटा लगाकर मध्यम मोटाई का पराठा बेलें।
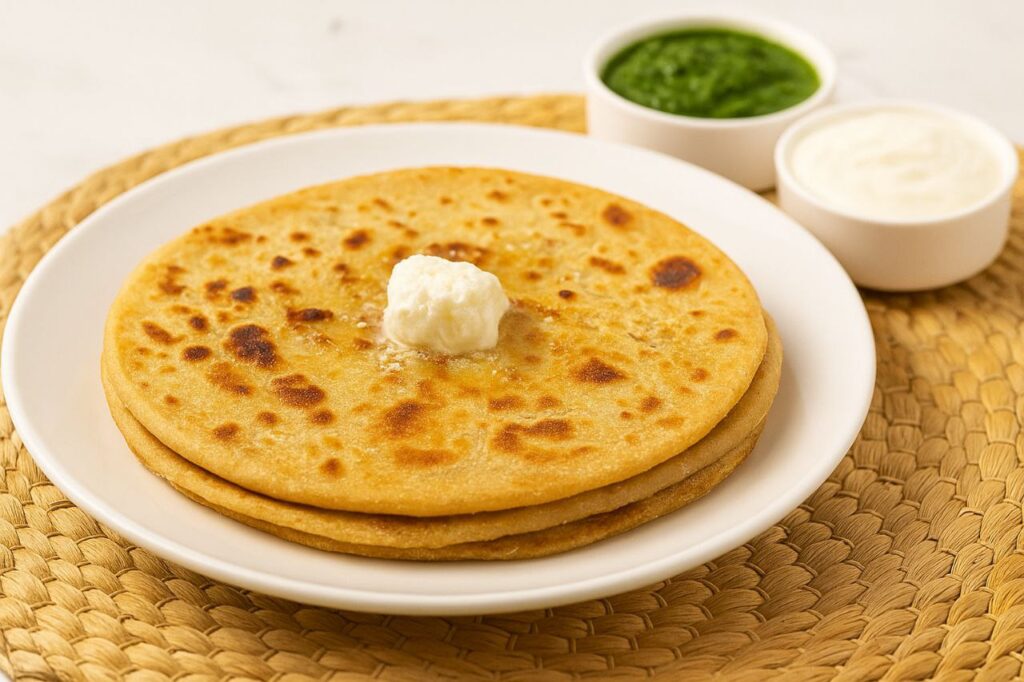
तवा गरम करें और हल्का सा घी लगाकर नैपकिन से पोंछ लें। पराठा मध्यम आंच पर डालें और दोनों तरफ हल्का-हल्का सुनहरा होने तक सेकें। अब घी लगाकर इसे गोल्डन ब्राउन और कुरकुरा होने तक सेकें। गर्मागर्म पनीर पराठा (Paneer Paratha) को मक्खन और अचार के साथ परोसें।
पनीर पराठा (Paneer Paratha) के लिए टिप्स
- आटे को हमेशा आराम (rest) देना जरूरी है, इससे पराठा फटेगा नहीं।
- प्याज को पहले से न मिलाएं, नहीं तो स्टफिंग गीली हो जाएगी।
- हरे मसाले को दरदरा रखें ताकि हर बाइट में उसका स्वाद महसूस हो।
- पराठा हमेशा मध्यम आंच पर सेंकें ताकि अंदर तक पक जाए।
- अगर पनीर सूखा लगे तो थोड़ा दही मिलाएं।
- चाहें तो स्टफिंग में थोड़ी कसूरी मेथी भी डाल सकते हैं।
- पराठा बेलते समय ज्यादा प्रेशर न डालें, वरना फट सकता है।
- सर्विंग के समय मक्खन की हल्की परत लगाना स्वाद को और बढ़ा देता है।
निष्कर्ष
पनीर पराठा (Paneer Paratha) हर भारतीय रसोई की शान है, लेकिन जब इसे हरे लहसुन के स्पेशल मसाले के साथ बनाया जाए, तो यह स्वाद और सेहत दोनों में unbeatable हो जाता है। यह रेसिपी घर के सभी सदस्यों को पसंद आएगी और इसका हरा, मसालेदार, हल्का तीखा स्वाद एक बार खाने के बाद भूलना मुश्किल है।
तो अगली बार जब भी पनीर घर में हो, तो इस हरे लहसुन वाले पनीर पराठा (Paneer Paratha) को ज़रूर ट्राई करें!
Paneer Paratha Recipe in English
If you are bored of eating the same old parathas every day and want to try something new, then this Green Garlic Special version of Paneer Paratha is just perfect for you!
This recipe brings a flavorful twist to the traditional paneer paratha, with a special green masala made from fresh green garlic that fills every bite with aroma and taste.
Paneer Paratha can be enjoyed at any time, breakfast, lunch, or dinner. It’s loved by both kids and adults because it’s loaded with protein-rich paneer and fresh herbs.
In this recipe, you’ll learn two easy ways to make Paneer Paratha, the Stuffed Ball Method and the Sandwich Method. Both methods give the perfect balance of crispiness and flavor. So, let’s get started with this quick and tasty recipe!
Ingredients for Paneer Paratha
For the dough:
- Wheat flour – 3 cups
- Salt – a pinch
- Oil – 1 teaspoon
- Water – as required
For the green masala:
- Green garlic – 15–20 cloves (cleaned with roots)
- Green chilies – 3–4
- Fresh coriander – 1 handful
- Mint leaves – a few
- Ginger – 1-inch piece
For the paneer stuffing:
- Paneer – 200 grams (grated using a large grater)
- Prepared green masala – as mentioned above
- Salt – to taste
- Crushed black pepper – ½ teaspoon
- Coarsely crushed coriander seeds – 1 teaspoon
- Anardana powder or amchur – ½ teaspoon
- Cumin powder – ½ teaspoon
- Finely chopped onion – 1 (add just before stuffing)
For roasting:
- Ghee or oil – as required
- For serving – butter and pickle
How to Make Paneer Paratha
In a large bowl, take 3 cups of wheat flour and a pinch of salt. Gradually add water and knead it into a semi-soft dough, neither too tight nor too loose. Add 1 teaspoon of oil and knead for about 4–5 minutes until the dough becomes smooth and elastic. Cover it with a damp cloth and let it rest for 30 minutes so it doesn’t crack while rolling.
In a chopper, add green garlic, green chilies, coriander, mint, and ginger. Grind them coarsely.
Note: Do not make it a fine paste; keep it slightly coarse for texture.
Now, take grated paneer in a bowl and mix in the prepared green masala, salt, black pepper, crushed coriander, amchur, and cumin powder. Add finely chopped onion just before stuffing to avoid releasing water.
You can stuff this paratha in two ways:
(A) Stuffed Ball Method:
Take a large portion of dough and press it with your thumb to make a small bowl shape. Fill it with the prepared paneer stuffing and seal the edges properly. Dust with dry flour and roll it gently into a medium-thick paratha.
(B) Sandwich Method:
Take two small dough balls and roll both into thin chapatis. Spread the stuffing evenly on one chapati, place the other one on top, seal the edges, dust with dry flour, and roll it into a medium-thick paratha.
Heat a tawa (griddle) and apply a little ghee, wiping it with a napkin. Place the paratha on medium flame and cook both sides until light golden. Then apply ghee and roast until it turns golden brown and crispy. Serve hot Paneer Paratha with butter and pickle.
Tips for Paneer Paratha
- Always let the dough rest to prevent cracking while rolling.
- Do not add onion too early; it will make the stuffing watery.
- Keep the green masala coarse to enjoy its flavor in every bite.
- Cook paratha on medium flame for even cooking inside.
- If paneer feels dry, add a spoon of curd.
- You can also add a little kasuri methi to the stuffing.
- Don’t apply too much pressure while rolling, or it may tear.
- Apply a thin layer of butter before serving to enhance flavor.
Conclusion
Paneer Paratha is a pride of every Indian kitchen, but when made with a special green garlic masala, it becomes unbeatable in both taste and nutrition. This recipe will be loved by everyone at home. The vibrant green color, spicy aroma, and mildly tangy flavor make it unforgettable after just one bite.
So next time you have paneer at home, do try this Green Garlic Paneer Paratha and enjoy a burst of flavor in every bite!
यह भी पढ़ें: गार्लिक नान (Garlic Naan)
यह भी पढ़ें: कोकोनट पूरी (Coconut Puri)
FAQs – पनीर पराठा (Paneer Paratha) से जुड़े सवाल
Q1. क्या पनीर पराठा (Paneer Paratha) के लिए पनीर को फ्राई करना ज़रूरी है?
नहीं, बिल्कुल नहीं। फ्राई करने से पनीर सख्त हो जाता है और उसकी softness चली जाती है। कच्चे पनीर की स्टफिंग से पराठा अंदर से मुलायम और रसदार बनता है, जो हर बाइट में melt-in-mouth फील देता है।
Q2. अगर हरा लहसुन (Green Garlic) ना मिले तो क्या करें?
अगर हरा लहसुन सीज़न में नहीं है, तो उसकी जगह थोड़ा सा सामान्य लहसुन और हरा धनिया इस्तेमाल कर सकते हैं। इससे स्वाद तो वही नहीं रहेगा, लेकिन फ्लेवर में ताजगी और खुशबू बनी रहेगी।
Q3. क्या पनीर पराठा (Paneer Paratha) बिना प्याज के बन सकता है?
हां, बिल्कुल बन सकता है। अगर आप व्रत में हैं या प्याज नहीं खाते, तो उसकी जगह थोड़ी सी कसूरी मेथी या पुदीना डाल दें। इससे पराठे में फ्लेवर भी बढ़ेगा और हल्का मसालेदार स्वाद भी आएगा।
Q4. क्या इस पनीर पराठा (Paneer Paratha) को पहले से बनाकर स्टोर किया जा सकता है?
हां, आप चाहें तो इसे आधा सेककर एयरटाइट डिब्बे में रख सकते हैं। जब ज़रूरत हो, तब बस हल्का सा दोबारा घी लगाकर सेक लें, ताजे जैसा ही स्वाद मिलेगा।
Q5. क्या पनीर पराठा (Paneer Paratha) को तेल में सेकना सही रहेगा?
हाँ, आप चाहें तो तेल का इस्तेमाल कर सकते हैं, लेकिन घी में सेकने पर इसका फ्लेवर और सुगंध दोनों कमाल के हो जाते हैं। घी पराठे को सुनहरा और कुरकुरा बनाता है।
Q6. अगर स्टफिंग गीली हो जाए तो क्या करें?
अगर स्टफिंग में प्याज या हरा मसाला ज़्यादा डालने से नमी आ जाए, तो थोड़ा सा बेसन या सूखा ब्रेड क्रम्ब्स मिला लें। इससे मिश्रण तुरंत सैट हो जाएगा और बेलते समय पराठा फटेगा नहीं।
Q7. क्या पनीर पराठा (Paneer Paratha) बच्चों के टिफिन में दे सकते हैं?
बिलकुल! बच्चों को ये बहुत पसंद आता है क्योंकि इसमें पनीर का हल्का स्वाद और हर्ब्स की खुशबू होती है। बस मिर्च थोड़ी कम डालें और दही या केचप के साथ पैक करें।
Q8. क्या स्टफिंग में चीज़ डालने से स्वाद बदलेगा?
थोड़ा सा चीज़ मिलाने से स्टफिंग और भी क्रीमी व रिच हो जाती है। इससे पराठा bite करने पर पिघलता है और स्वाद में एक cheesy twist आ जाता है, जो बच्चों को बहुत पसंद आता है।