चीज़लिंग (Cheeselings) बनाने की परफेक्ट रेसिपी
अगर आप स्नैक्स के शौकीन हैं और मार्केट में मिलने वाले पार्ले मोनाको के चीज़लिंग (Cheeselings) का स्वाद आपको पसंद आता है, तो अब आपको इसे खरीदने की ज़रूरत नहीं। क्योंकि आज हम आपको सिखाने वाले हैं एकदम आसान और झटपट बनने वाली चीज़लिंग (Cheeselings) की होममेड रेसिपी। यह रेसिपी शाम की चाय या फिर टीवी देखते हुए munch करने के लिए भी बेहतरीन ऑप्शन है।
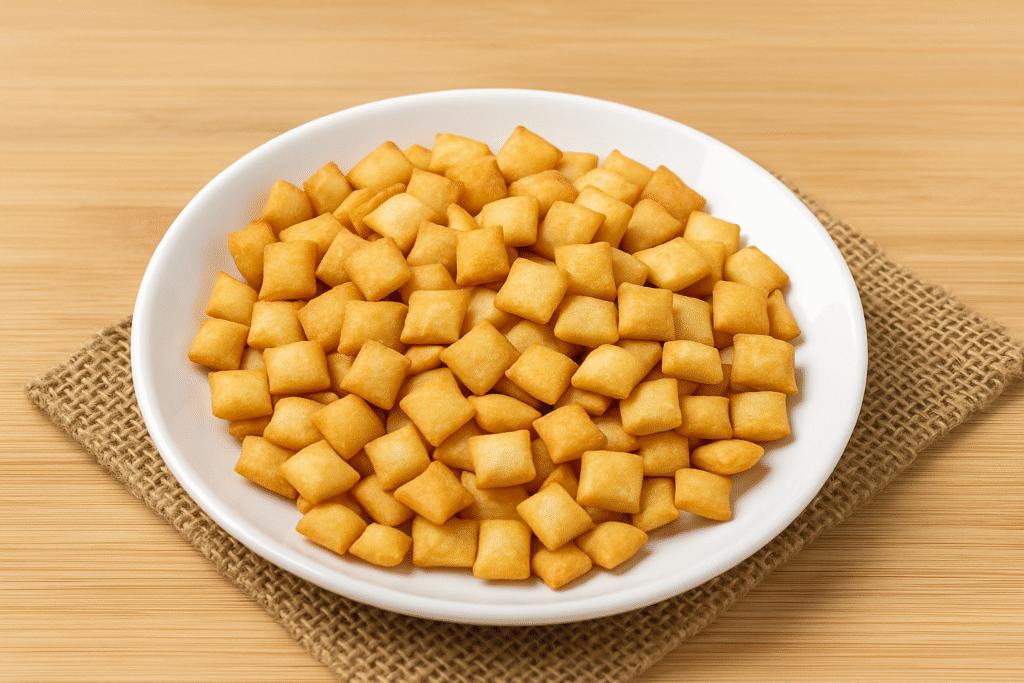
इन छोटे-छोटे कुरकुरे स्क्वेयर बाइट्स का स्वाद इतना मज़ेदार होता है कि एक बार खाने पर आप रुक ही नहीं पाएंगे। सबसे अच्छी बात यह है कि घर पर बनने वाले चीज़लिंग (Cheeselings) में आपको शुद्धता और फ्लेवर दोनों का कॉम्बिनेशन मिलेगा, साथ ही आप इन्हें अपने टेस्ट के हिसाब से कस्टमाइज़ भी कर सकते हैं। चलिए शुरू करते हैं इस लाजवाब रेसिपी को।
चीज़लिंग (Cheeselings) के लिए सामग्री
- 1 कप मैदा
- 2 बड़े चम्मच मक्खन
- 2 बड़े चम्मच कद्दूकस किया हुआ पनीर (या प्रोसेस्ड चीज़)
- 1 छोटा चम्मच तेल
- स्वादानुसार नमक
- 2–3 बड़े चम्मच दूध (आटा गूँथने के लिए)
- तलने के लिए तेल
चीज़लिंग (Cheeselings) बनाने की विधि
सबसे पहले एक गहरे बाउल में मैदा डाल लें। इसमें मक्खन, कद्दूकस किया हुआ पनीर और थोड़ा सा तेल मिलाएँ। अब दोनों हथेलियों से इसे अच्छे से मसल-मसल कर मिलाते जाएँ, जब तक कि इसका texture ब्रेडक्रंब जैसा न लगने लगे। अब इस मिश्रण में नमक डालें और धीरे-धीरे दूध डालते हुए एक सख़्त आटा गूँथ लें। आटा गूँथते समय यह ध्यान रखें कि यह नरम न हो, बल्कि थोड़ा टाइट ही रहे। जब आटा तैयार हो जाए, तो इसे लगभग 10–15 मिनट के लिए ढककर रख दें। इससे आटा सेट हो जाएगा और बेलने में आसानी होगी।
अब आटे की लोई बनाकर बेलन की मदद से इसे बहुत पतला बेलें। जितना पतला आटा होगा, उतने ही कुरकुरे आपके चीज़लिंग (Cheeselings) बनेंगे। कोशिश करें कि thickness एक जैसी हो, ताकि तलते समय सब बराबर पकें। जब आटा अच्छे से बेल लिया जाए, तो चाकू या पिज़्ज़ा कटर से छोटे-छोटे चौकोर टुकड़े काट लें। चाहें तो इन्हें फोर्क से हल्का सा दबाकर छेद भी कर सकते हैं, ताकि तलते समय ये ज़्यादा फूलें नहीं और shape भी अच्छा बना रहे।
अब एक कड़ाही में तेल गर्म करें। तेल मध्यम आँच पर होना चाहिए—अगर तेल बहुत ज्यादा गरम होगा तो ऊपर से जल्दी सिक जाएगा और अंदर से कच्चा रह सकता है, और अगर तेल ठंडा होगा तो ये ज़्यादा तेल सोख लेंगे और कुरकुरे नहीं बनेंगे। तेल सही तापमान पर आ जाने के बाद कटे हुए टुकड़ों को बैच में डालें और सुनहरा भूरा और क्रिस्पी होने तक तलें। इन्हें बार-बार पलटते रहें ताकि चारों तरफ से बराबर सिकें।
जब ये पूरी तरह से कुरकुरे हो जाएं तो इन्हें निकालकर टिशू पेपर पर रख दें, ताकि अतिरिक्त तेल निकल जाए। ठंडा हो जाने पर इन्हें एयरटाइट डिब्बे में भरकर स्टोर करें। इस तरह आपके घर पर बने कुरकुरे, टेस्टी और बिल्कुल मार्केट जैसे चीज़लिंग (Cheeselings) तैयार हैं।
चीज़लिंग (Cheeselings) के लिए टिप्स
- आटा हमेशा टाइट गूँथें ताकि तलते समय चीज़लिंग (Cheeselings) फूलें नहीं।
- इन्हें ज़्यादा मोटा न बेलें, वरना कुरकुरे नहीं बनेंगे।
- तलते समय तेल न तो बहुत ठंडा होना चाहिए और न ही बहुत ज्यादा गर्म।
- बेहतर फ्लेवर के लिए आप चाहें तो आटे में अजवाइन, ओरेगैनो या काली मिर्च मिला सकते हैं।
- अगर हेल्दी वर्ज़न चाहते हैं तो इन्हें बेक भी कर सकते हैं।
- इन्हें ठंडा होने के बाद ही डिब्बे में स्टोर करें वरना ये नरम हो सकते हैं।
- लंबे समय तक स्टोर करने के लिए एयरटाइट कंटेनर ज़रूरी है।
- बच्चों के लिए हल्का नमक डालें और बड़े लोगों के लिए मसालेदार वर्ज़न तैयार करें।
निष्कर्ष
घर पर बने चीज़लिंग (Cheeselings) मार्केट से कहीं ज्यादा स्वादिष्ट और हेल्दी होते हैं। इन्हें बनाना बेहद आसान है और आप इन्हें कभी भी स्नैक टाइम के लिए तैयार कर सकते हैं। चाहे बच्चों का टिफिन हो या फैमिली के लिए ईवनिंग स्नैक, यह रेसिपी सभी को पसंद आएगी।
Crispy and Tasty Cheeselings Recipe In English
If you are fond of snacks and love the taste of Parle Monaco Cheeselings available in the market, then you don’t need to buy them anymore. Because today we are going to teach you an easy and quick homemade Cheeselings recipe. This recipe is a perfect option to munch on with evening tea or while watching TV.
These small, crispy square bites taste so amazing that once you start eating, you just can’t stop. The best part is that homemade Cheeselings give you both purity and flavor, and you can also customize them according to your taste. So, let’s get started with this delicious recipe.
Ingredients for Cheeselings
- 1 cup all-purpose flour
- 2 tablespoons butter
- 2 tablespoons grated paneer (or processed cheese)
- 1 teaspoon oil
- Salt to taste
- 2–3 tablespoons milk (for kneading dough)
- Oil for frying
How to Make Cheeselings
First, take a deep bowl and add flour. Mix in butter, grated paneer, and a little oil. Rub it well with your palms until the texture becomes like breadcrumbs. Now add salt and gradually pour in milk while kneading to make a stiff dough. Make sure the dough is not soft; it should remain slightly tight. Once ready, cover it and let it rest for 10–15 minutes so it sets well and becomes easier to roll.
Make a ball of the dough and roll it out with a rolling pin into a very thin sheet. The thinner the dough, the crispier your Cheeselings will be. Try to keep the thickness even so they cook uniformly. Cut the rolled dough into small square pieces using a knife or pizza cutter. You may also prick them lightly with a fork to prevent puffing and to keep their shape intact while frying.
Heat oil in a pan. The oil should be on medium heat—if it’s too hot, the pieces will brown quickly from outside and stay raw inside; if too cold, they will absorb excess oil and won’t turn crispy. Once the oil is at the right temperature, drop in the pieces in batches and fry until golden brown and crispy.
Keep turning them so they cook evenly from all sides. Remove and place them on tissue paper to absorb excess oil. Once cooled, store them in an airtight container. Your crispy, tasty, and perfectly market-style Cheeselings are ready at home.
Tips for Cheeselings
- Always knead the dough tightly so Cheeselings don’t puff while frying.
- Don’t roll them too thick, otherwise, they won’t turn crispy.
- Oil should neither be too cold nor too hot while frying.
- For better flavor, you can add carom seeds, oregano, or black pepper to the dough.
- For a healthier version, you can bake them instead of frying.
- Always store them only after cooling, otherwise, they may turn soft.
- Use an airtight container for long-term storage.
- For kids, keep them mildly salted, and for adults, you can make a spicier version.
Conclusion
Homemade Cheeselings are much tastier and healthier than the ones available in the market. They are very easy to make and can be prepared anytime for snack time. Whether for kids’ tiffin or for an evening snack with the family, this recipe will be loved by everyone.
FAQs – चीज़लिंग (Cheeselings) से जुड़े सवाल
Q1. क्या मैं चीज़ की जगह सिर्फ़ पनीर का इस्तेमाल कर सकती हूँ?
हाँ, आप प्रोसेस्ड चीज़ की जगह पनीर का इस्तेमाल कर सकती हैं। बस ध्यान रखें कि पनीर को बारीक कद्दूकस करके डालें।
Q2. अगर दूध न हो तो आटा किससे गूँथा जा सकता है?
आप चाहें तो पानी का उपयोग कर सकते हैं, लेकिन दूध से फ्लेवर और क्रिस्पीनेस बेहतर आती है।
Q3. क्या चीज़लिंग (Cheeselings) को बेक किया जा सकता है?
हाँ, आप इन्हें 180°C पर प्रीहीटेड ओवन में 12–15 मिनट तक बेक कर सकते हैं।
Q4. इन्हें कितने दिन तक स्टोर किया जा सकता है?
एयरटाइट कंटेनर में रखने पर ये 10–12 दिन तक क्रिस्पी रह सकते हैं।
Q5. तलते समय अगर चीज़लिंग फूल जाएं तो क्या करें?
इसका मतलब है कि आटा ज़्यादा सॉफ्ट गूँथा गया है। अगली बार आटे को टाइट गूँथें।
Q6. क्या मैं इसमें फ्लेवरिंग मसाले डाल सकती हूँ?
बिल्कुल, आप ओरेगैनो, चिली फ्लेक्स, अजवाइन या लहसुन पाउडर डालकर इसे और टेस्टी बना सकती हैं।
Q7. क्या बच्चों के टिफिन में यह स्नैक देना ठीक है?
हाँ, यह बच्चों के लिए बहुत अच्छा स्नैक है, बस मसाले हल्के रखें।
Q8. क्या बिना मक्खन के भी चीज़लिंग (Cheeselings) बनाए जा सकते हैं?
हाँ, आप सिर्फ़ तेल का इस्तेमाल कर सकते हैं, लेकिन मक्खन से इनका स्वाद और टेक्सचर बेहतर बनता है।